Press F1 (or click the question mark
 symbol in the corner of window) anytime
to show help for current page of Wizard.
symbol in the corner of window) anytime
to show help for current page of Wizard.|
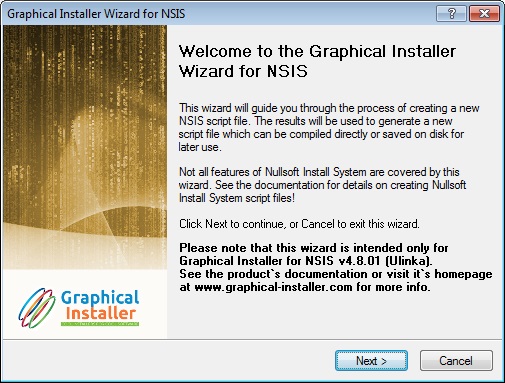
Description of Graphical Installer Wizard's
pages
|
![]() Tip:
Tip:
Press F1 (or click the question mark  symbol in the corner of window) anytime
to show help for current page of Wizard.
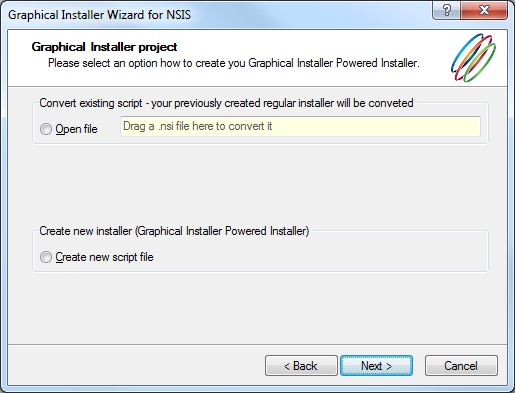
![]() Open file - use this option to convert any
existing script (NSIS script based on MUI2)
Open file - use this option to convert any
existing script (NSIS script based on MUI2)
This option is suitable in case you have a working NSIS script
(.nsi file) for your installer and you wish to enhance it (to skin
it with Graphical Installer).
Wizard will convert your script into Graphical Installer Powered
Installer and it will generate Graphical Installer Project
Unique Identifier (GIP_UID) for you.
This identifier is generated automatically from script file you
choose and it is used to recognize <project>.nsi file and
<project>.graphics.nsh.
In this mode Wizard will skip few pages and it will jump directly
to Page 9 (Page Uninstaller & Other
options ).
![]() Warning:
Warning:
After converting your scripts there still may be need to adjust
your code manually - not all features can be converted
automatically!
If something unusual is found in your script the Wizard will show a
warning. Also errors can be shown if your code is too old or
deprecated!
![]() Create new script file - use this option
to create new skinned installer from scratch (Graphical Installer
Powered Installer).
Create new script file - use this option
to create new skinned installer from scratch (Graphical Installer
Powered Installer).
If you select this options Wizard offers you many options - how
your new installer will look, which files it will contain and many
other features.
In this mode Wizard will continue with next Page
3 (Page Application Information).
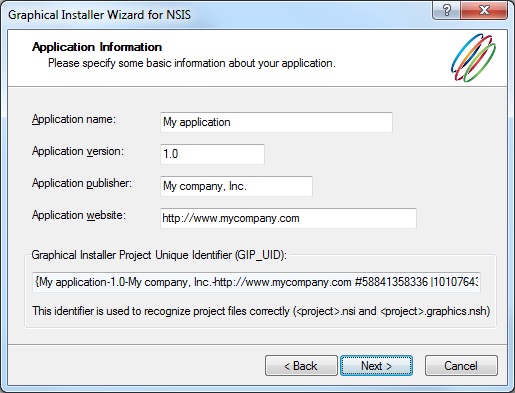
![]() Field Graphical Installer Project Unique
Identifier (GIP_UID) contains unique identifier.
Field Graphical Installer Project Unique
Identifier (GIP_UID) contains unique identifier.
This identifier is generated automatically and it is used to
recognize <project>.nsi file and
<project>.graphics.nsh.
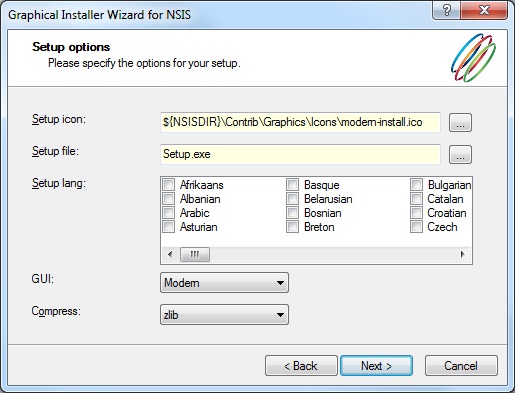
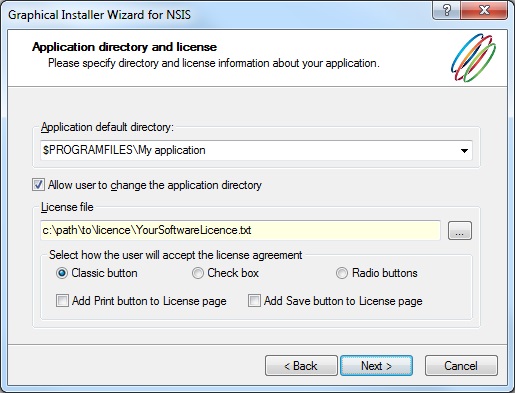
![]() Checkbox Add Print button to the license
page is used for printing license file from Installer.
Checkbox Add Print button to the license
page is used for printing license file from Installer.
If checked, Print button is added to page License; after its click
License file is sent to default printer.
![]() Checkbox Add Save button to the license
page is used for saving license file from Installer.
Checkbox Add Save button to the license
page is used for saving license file from Installer.
If checked, Save button is added to License page; after its click
the Save as dialog is shown and user can save license file to his
disk.
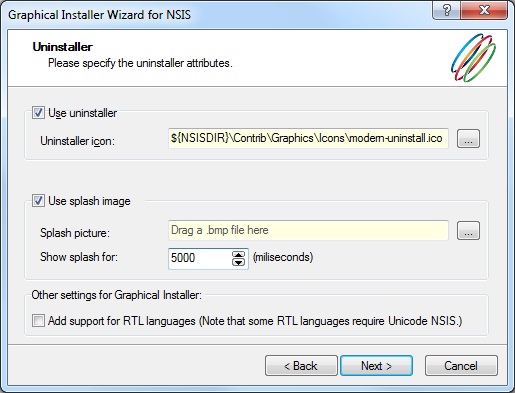
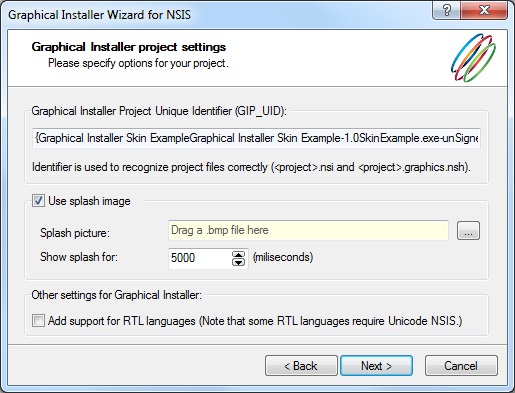
![]() Checkbox Use splash image is used for
splash picture (shown when installer starts).
Checkbox Use splash image is used for
splash picture (shown when installer starts).
If checked, Splash picture is shown for defined time
(Show splash for) in miliseconds.
![]() Checkbox Add support for RTL languages is used for
definition of RTL picture.
Checkbox Add support for RTL languages is used for
definition of RTL picture.
If checked, RTL version of background picture is automatically
generated.
![]() Field Graphical Installer Project Unique
Identifier (GIP_UID) contains unique identifier.
Field Graphical Installer Project Unique
Identifier (GIP_UID) contains unique identifier.
This identifier is generated automatically and it is used to
recognize <project>.nsi file and
<project>.graphics.nsh.
![]() Tip:
Tip:
If you want to create installer which uses both RTL & LTR
languages you need to check Add support for RTL languages.
Use NSIS 3 (or any Unicode NSIS) to create full RTL
installers.
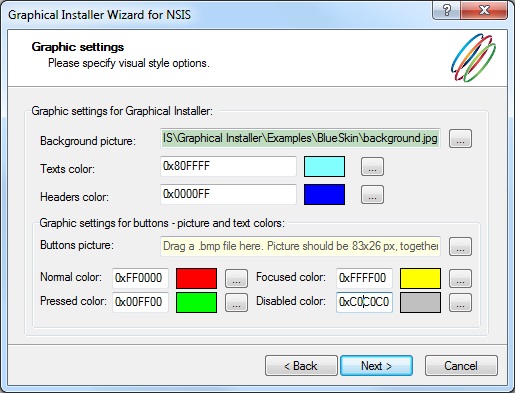
![]() Field Background picture represents the
main picture of installer.
Field Background picture represents the
main picture of installer.
Write path to desired file or click button Browse  to select file from your machine.
![]() Field Texts color defines color for common texts in
installer.
Field Texts color defines color for common texts in
installer.
You can type color manually as 0xRRGGBB or click button Browse  to select desired color from color
selection dialog.
![]() Field Headers color defines color for header texts in
installer.
Field Headers color defines color for header texts in
installer.
You can type color manually as 0xRRGGBB or click button Browse  to select desired color from color
selection dialog.
![]() Field Buttons picture represents picture
for installer buttons.
Field Buttons picture represents picture
for installer buttons.
Write path to desired file or click button Browse  to select file from your machine.
![]() Field Normal color defines color for all buttons in
installer (in normal state).
Field Normal color defines color for all buttons in
installer (in normal state).
You can type color manually as 0xRRGGBB or click button Browse  to select desired color from color
selection dialog.
![]() Field Focused color defines color for button when the button
is focused.
Field Focused color defines color for button when the button
is focused.
You can type color manually as 0xRRGGBB or click button Browse  to select desired color from color
selection dialog.
![]() Field Pressed color defines color for buttons in installer
when the button is pressed down.
Field Pressed color defines color for buttons in installer
when the button is pressed down.
You can type color manually as 0xRRGGBB or click button Browse  to select desired color from color
selection dialog.
![]() Field Disabled color defines color for all buttons in
installer (in disabled state).
Field Disabled color defines color for all buttons in
installer (in disabled state).
You can type color manually as 0xRRGGBB or click button Browse  to select desired color from color
selection dialog.
![]() Tip: For background use a picture with size of
690 x 496 pixels. This must be set! Supported formats:
.bmp .jpg .gif.
Tip: For background use a picture with size of
690 x 496 pixels. This must be set! Supported formats:
.bmp .jpg .gif.
For button picture use .bmp image with 83 x 104 pixels
(picture with 4 states: normal, focused, pressed, disabled).
This must be set!
![]() Warning:
Warning:
Background of the installer consists from two separate images: the
background image itself - this one you choose in Wizard - and the
inner dialogs image (generated automatically by extern application
from Wizard).
However you choose only background image the inner dialogs image
is also used to redraw NSISs dialogs controls, so it must be
created.
If you are importing some skin or image, you need to generate this
small image manually run the BitmapCutter tool
manually.
![]() Tip:
Tip:
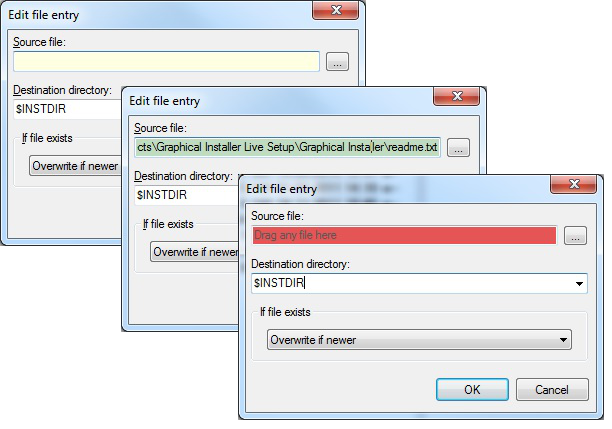
Anytime you see an yellow field (usually with some hint like 'Drag
file here') in dialog, you can use Drag and Drop to select file
into this field to speed up your work.
If correct file is used the field turns green. On wrong file it
turns red.